本稿の内容に関して
本稿は GDEXTENSION の開発環境構築を行った際のメモの共有を意図した、一連の記事の6番目。
前稿(その5)では GDEXTENSION 開発で使うべくいくつかの C++ ライブラリを MinGW-w64、x86 64bit アーキテクチャの条件でスタティックリンクライブラリとしてビルドした。
(その5)で終わろうと思っていたが、前稿までの記述で訂正しなければならないものもあり、本稿では C++ ライブラリの応用例として、比較的需要が高いと思われる pcl を題材に、GDEXTENSION での簡易点群ファイルビューワーを実装してみる。
通常の Windows アプリケーションとしてのビルド
先ず、pcl を用いた以下のサンプルを、通常の Windows アプリケーションとして scons を用いてビルドする。
main.cpp
#include <pcl/visualization/cloud_viewer.h>
#include <pcl/io/pcd_io.h>
#include <pcl/features/normal_3d.h>
#include <iostream>
using namespace std;

int main()
{
	pcl::PointCloud<pcl::PointXYZRGB>::Ptr cloud(new pcl::PointCloud<pcl::PointXYZRGB>);
    pcl::io::loadPCDFile<pcl::PointXYZRGB>("./car6.pcd", *cloud);

	cout << "Size : " << cloud->points.size() << std::endl;

    Eigen::Vector4f centroid;
	pcl::compute3DCentroid(*cloud, centroid);

	for (int i = 0; i < cloud->points.size(); i++) {
        cloud->points[i].x -= centroid[0];// Shift X-axis to ZERO.
        cloud->points[i].y -= centroid[1];// Shift Y-axis to ZERO.
        cloud->points[i].z -= centroid[2];// Shift Z-axis to ZERO.

		cloud->points[i].r=255;
		cloud->points[i].g=0;
		cloud->points[i].b=0;
	}

	pcl::visualization::CloudViewer viewer("PointCloudViewer");
	viewer.showCloud(cloud);

	while (!viewer.wasStopped())
	{
	}
	return 0;
}
このサンプルは、実行ファイルと同じディレクトリにある点群ファイル car6.pcd を読み込み、全点群を重心と原点が一致するように移動させ、ビューワーにより可視化するもの。
SConstruct ファイルは以下とする。
SConstruct
import os
import sys

env = Environment(tools = ['mingw'])

# project setting
project_name = 'Sample'
pkgs = ['pcl_visualization', 'boost', 'vtk', 'eigen3']
libs_implicit = ['psapi', 'wsock32', 'comdlg32', 'oleAut32', 'uuid', 'gdi32']
env.Append(CXXFLAGS = ['-std=c++14', '-mwindows', '-mwin32'])
env.Append(LINKFLAGS = ['-mwindows', '-mwin32', '-static-libgcc', '-static-libstdc++',
                        '-static', '-pthread'])

# add env-define setting for pkg-config
if 'PKG_CONFIG_EXE_DIR' in os.environ:
    env['ENV']['PATH'] += f";{os.environ['PKG_CONFIG_EXE_DIR']}"
else:
    print("Erroerr: PKG_CONFIG_EXE_DIR is NOT set!")
    sys.exit(1)

if 'PKG_CONFIG_PATH' in os.environ:
    env['ENV']['PKG_CONFIG_PATH'] = os.environ['PKG_CONFIG_PATH'].replace('\\', '/')
else:
    print("Erroerr: PKG_CONFIG_PATH is NOT set!")
    sys.exit(1)

# make build-option meta data with pkg-config
env.ParseConfig(f"pkg-config {' '.join(pkgs)} --static --cflags --libs")
for path in env['LIBPATH']:
    env['LIBS'] = [env['LIBPREFIX']+i+env['LIBSUFFIX'] \
                   if os.path.isfile(os.path.join(path, env['LIBPREFIX']+i+env['LIBSUFFIX'])) \
                   else i for i in env['LIBS']]
env.Append(LIBS = libs_implicit)

sources = Glob("src/*.cpp")
env.Program(project_name, source=sources)
以下の行は、必要なライブラリの pkg_config を指定している。
pkgs = ['pcl_visualization', 'boost', 'vtk', 'eigen3']
pcl のライブラリ指定であるが、可視化のために ‘pcl_visualization’ を用いているが、この指定で他の pcl モジュールも使用可能。他に ‘boost’, ‘vtk’, ‘eigen3’ を使用する。
これらを以下のように設置する。
C:dev/sample/pcl_sample
│  car6.pcd
│  SConstruct
│
└─src
        main.cpp
ビルドは scons を実行する。
Microsoft Windows [Version 10.0.22631.2861]
(c) Microsoft Corporation. All rights reserved.

c:\Users\user>mingw64.bat
c:\dev>cd samples
c:\dev\samples>cd pcl_sample
c:\dev\samples\pcl_sample>scons
ビルドが成功すると以下の生成物が得られる。
C:dev/sample/pcl_sample
│  .sconsign.dblite
│  Sample.exe
│  SConstruct
│
└─src
        main.cpp
        main.o
pcl のビルドディレクトリから点群ファイル car6.pcd をコピーする。
c:\dev\samples\pcl_sample>copy C:\dev\pcl-1.13.1\test\car6.pcd .
結果的にファイル構成は以下のようになる。
C:dev/sample/pcl_sample
│  .sconsign.dblite
│  car6.pcd
│  Sample.exe
│  SConstruct
│
└─src
        main.cpp
        main.o
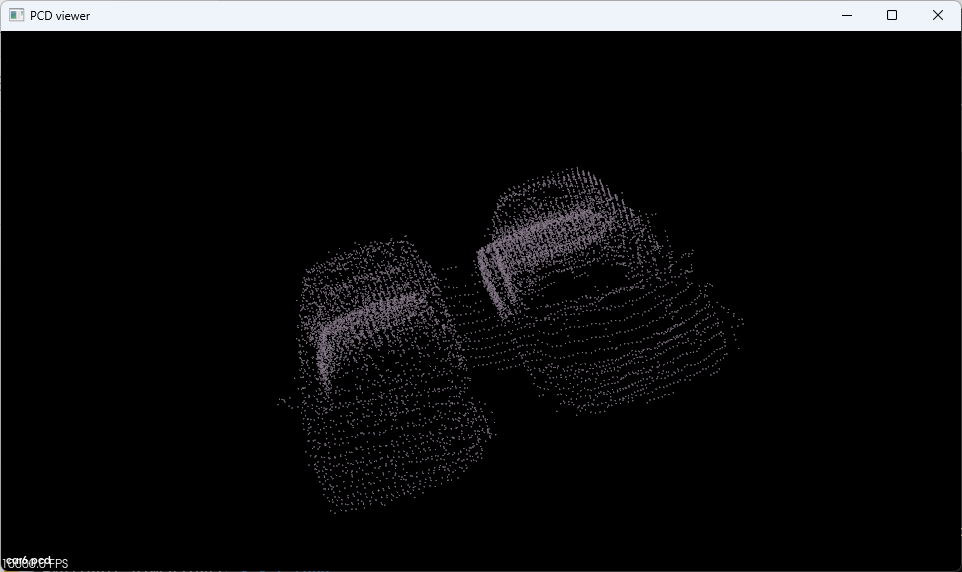
Sample.exe を実行すると pcl viewer でよく見る以下のような画面になる。
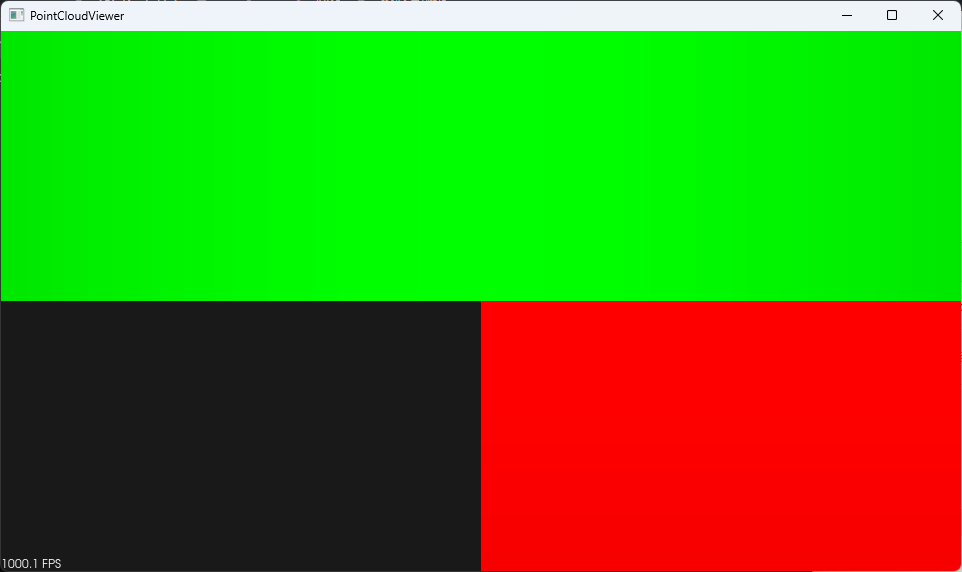
この緑赤黒はゼロ距離での 3D ギズモであり、ホイールで距離を取ると以下のように二台の車の赤い点群が見えてくる。
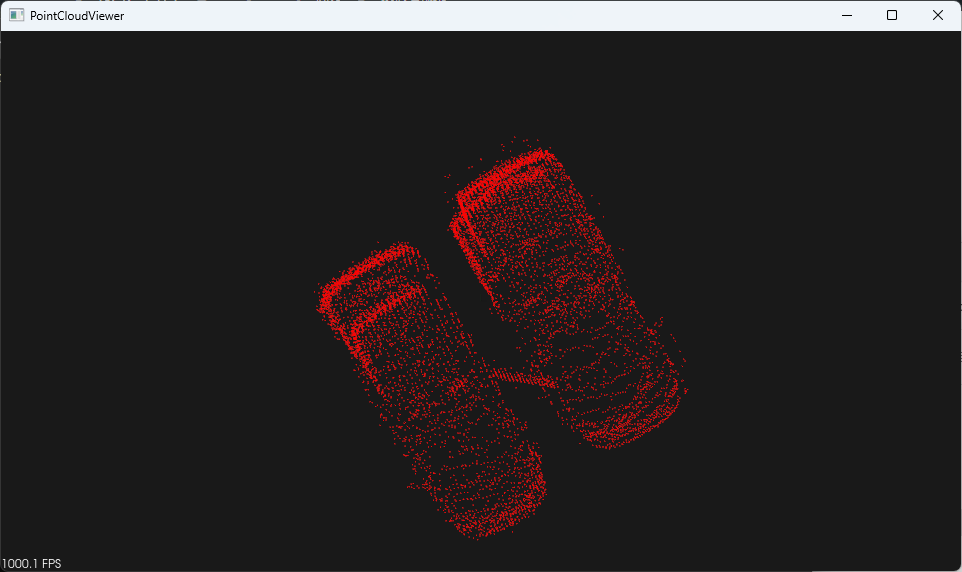
マウスを使って点群を動かすことができる。”q” を押下するとプログラムを終了することができる。
GDEXTENSION としてのビルド
pcl ライブラリの動作確認ができたので、次は GDEXTENSION として実装する。
ソースコード
ソースコードは以下の4つ。
gdexample.h
#ifndef GDEXAMPLE_H
#define GDEXAMPLE_H

#include <godot_cpp/classes/mesh_instance3d.hpp>
#include <godot_cpp/classes/immediate_mesh.hpp>

#include <pcl/io/pcd_io.h>
#include <pcl/features/normal_3d.h>

namespace godot {

class PCLSample : public MeshInstance3D {
    GDCLASS(PCLSample, MeshInstance3D);
    ImmediateMesh mesh;
protected:
    static void _bind_methods();
public:
    PCLSample();
    ~PCLSample();
    int openCloud(const String &p_file);
};

}

#endif
本 GDEXTENSION は MeshInstance3D クラスを継承する PCLSample クラスとする。
private メンバとして ImmediateMesh クラスインスタンス mesh を持つ。 また、GDScript から 点群ファイルをオープンするために使用する public メソッド “int openCloud(const String &p_file)” を定義する。
gdexample.cpp
#include "gdexample.h"
#include <godot_cpp/core/class_db.hpp>

#ifdef DEBUG_ENABLED
#include <godot_cpp/variant/utility_functions.hpp> // for "UtilityFunctions::print()".
#endif // DEBUG_ENABLED

#include <filesystem>

using namespace godot;

void PCLSample::_bind_methods()
{
    ClassDB::bind_method(D_METHOD("open_cloud", "file_path"), &PCLSample::openCloud);
}

PCLSample::PCLSample()
{
}

PCLSample::~PCLSample()
{
}

int PCLSample::openCloud(const String &file_path)
{
#ifdef DEBUG_ENABLED
    UtilityFunctions::print(file_path.utf8().ptr());
#endif // DEBUG_ENABLED

	if (!std::filesystem::is_regular_file(file_path.utf8().ptr())) {

#ifdef DEBUG_ENABLED
		UtilityFunctions::print(std::filesystem::current_path().c_str());
#endif // DEBUG_ENABLED
		return 0;
	}

	pcl::PointCloud<pcl::PointXYZRGB>::Ptr cloud(new pcl::PointCloud<pcl::PointXYZRGB>);
    pcl::io::loadPCDFile<pcl::PointXYZRGB>(file_path.utf8().ptr(), *cloud);

#ifdef DEBUG_ENABLED
	UtilityFunctions::print("size: %d\n", cloud->points.size());
#endif // DEBUG_ENABLED
	if (cloud->points.size() <= 0){
		return 0;
	}

	Eigen::Vector4f centroid;
	pcl::compute3DCentroid(*cloud, centroid);

	set_mesh(&mesh);
	mesh.clear_surfaces();
	mesh.surface_begin(mesh.PRIMITIVE_POINTS);
	mesh.surface_set_color(Color(255, 0, 0, 1.00));

	for (int i = 0; i < cloud->points.size(); i++) {
		mesh.surface_add_vertex(Vector3(cloud->points[i].x - centroid[0],
		                                cloud->points[i].y - centroid[1],
		                                cloud->points[i].z - centroid[2]));
	}
	mesh.surface_end();

	return 1;
}
PCLSample::openCloud メソッドを open_cloud という名前でバインドする。
void PCLSample::_bind_methods()
{
    ClassDB::bind_method(D_METHOD("open_cloud", "file_path"), &PCLSample::openCloud);
}
コンストラクタ及びデストラクタでは何もしない。
PCLSample::openCloud() メソッドではファイル名を引数に受け取り、ファイルの存在を確認する。
自動変数として PointXYZRGB 型のクラスインスタンス cloud を作り、そこに点群ファイルを読み込む。
	pcl::PointCloud<pcl::PointXYZRGB>::Ptr cloud(new pcl::PointCloud<pcl::PointXYZRGB>);
    pcl::io::loadPCDFile<pcl::PointXYZRGB>(file_path.utf8().ptr(), *cloud);
点群の重心座標を取得する。
	Eigen::Vector4f centroid;
	pcl::compute3DCentroid(*cloud, centroid);
private メンバである ImmediateMesh インスタンス mesh の参照を継承クラス MeshInstance3D の mesh メンバにセットし、内容をクリアする。
	set_mesh(&mesh);
	mesh.clear_surfaces();
mesh 設定を頂点のみで開始するとともに、色を赤に設定する。
	mesh.surface_begin(mesh.PRIMITIVE_POINTS);
	mesh.surface_set_color(Color(255, 0, 0, 1.00));
注意:
GDEXTENSION 側で mesh メンバを設定してしまっているので、この GDEXTENSION の mesh メンバは Godot エンジンの GDScript 側では操作してはならない。
点群の座標を重心が原点になるようにシフトしながら、mesh の頂点としてセットする。完了後、mesh の設定を終わる。
	for (int i = 0; i < cloud->points.size(); i++) {
		mesh.surface_add_vertex(Vector3(cloud->points[i].x - centroid[0],
		                                cloud->points[i].y - centroid[1],
		                                cloud->points[i].z - centroid[2]));
	}
	mesh.surface_end();
register_types.h
#ifndef GDEXAMPLE_REGISTER_TYPES_H
#define GDEXAMPLE_REGISTER_TYPES_H

void initialize_example_module();
void uninitialize_example_module();

#endif // GDEXAMPLE_REGISTER_TYPES_H
register_types.cpp
#include "register_types.h"

#include "gdexample.h"

#include <gdextension_interface.h>
#include <godot_cpp/core/defs.hpp>
#include <godot_cpp/core/class_db.hpp>
#include <godot_cpp/godot.hpp>

using namespace godot;

void initialize_example_module(ModuleInitializationLevel p_level) {
    if (p_level != MODULE_INITIALIZATION_LEVEL_SCENE) {
        return;
    }

    ClassDB::register_class<PCLSample>();
}

void uninitialize_example_module(ModuleInitializationLevel p_level) {
    if (p_level != MODULE_INITIALIZATION_LEVEL_SCENE) {
        return;
    }
}

extern "C" {
// Initialization.
GDExtensionBool GDE_EXPORT example_library_init(GDExtensionInterfaceGetProcAddress p_get_proc_address, const GDExtensionClassLibraryPtr p_library, GDExtensionInitialization *r_initialization) {
    godot::GDExtensionBinding::InitObject init_obj(p_get_proc_address, p_library, r_initialization);

    init_obj.register_initializer(initialize_example_module);
    init_obj.register_terminator(uninitialize_example_module);
    init_obj.set_minimum_library_initialization_level(MODULE_INITIALIZATION_LEVEL_SCENE);

    return init_obj.init();
}
}
ビルド
SConstruct ファイルは以下とする。
SConstruct
#!/usr/bin/env python
import os
import sys
import SCons.Util

project_name = 'libgdexample'
env = SConscript('./godot-cpp-4.2.1-stable/SConstruct')

# add env-define setting for pkg-config
if 'PKG_CONFIG_EXE_DIR' in os.environ:
    env['ENV']['PATH'] += f";{os.environ['PKG_CONFIG_EXE_DIR']}"
else:
    print("Error: PKG_CONFIG_EXE_DIR is NOT set!")
    sys.exit(1)
if 'PKG_CONFIG_PATH' in os.environ:
    env['ENV']['PKG_CONFIG_PATH'] = os.environ['PKG_CONFIG_PATH'].replace('\\', '/')
else:
    print("Error: PKG_CONFIG_PATH is NOT set!")
    sys.exit(1)

if env['platform'] == "windows" and env['use_mingw'] == True and env['arch'] == "x86_64":
    # strip -fno-exceptions from $CXXFLAGS
    env['CXXFLAGS'] = SCons.Util.CLVar(str(env['CXXFLAGS']).replace("-fno-exceptions", ""))

    pkgs = ['pcl_features', 'pcl_io', 'boost', 'eigen3']
    libs_implicit = ['psapi', 'wsock32', 'comdlg32', 'oleAut32', 'uuid']
    env.Append(LINKFLAGS = ['-static-libgcc', '-static-libstdc++', '-static', '-pthread'])

    # make build-option meta data with pkg-config
    env.ParseConfig(f"pkg-config {' '.join(pkgs)} --static --cflags --libs")

    for path in env['LIBPATH']:
        env['LIBS'] = [env['LIBPREFIX']+i+env['LIBSUFFIX'] \
                       if type(i) is str and \
                       os.path.isfile(os.path.join(path, env['LIBPREFIX']+i+env['LIBSUFFIX'])) \
                       else i for i in env['LIBS']]
    env.Append(LIBS = libs_implicit)

else:
    print("not suppoted conbination!")
    print("platform",env["platform"])
    print("use_mingw",env["use_mingw"])
    print("use_clang_cl",env["use_clang_cl"])
    print("use_static_cpp",env["use_static_cpp"])
    print("android_api_level",env["android_api_level"])
    print("ios_simulator",env["ios_simulator"])
    print("ios_simulator",env["ios_simulator"])
    print("arch",env["arch"])
    exit()

env.Append(CPPPATH=["src/"])

sources = Glob("src/*.cpp")
library = env.SharedLibrary(
    "project/bin/{}{}{}".format(project_name,env["suffix"], env["SHLIBSUFFIX"]),
    source=sources,
)
Default(library)
godot-cpp であるが、(その3)及び(その4)では 使いまわそうとして、c:\dev 配下に置いたが、使いまわしでは scons 実行でエラーが出る。しかたがないので、サブモジュールとして配置する。そのため、直下の ‘./godot-cpp-4.2.1-stable/SConstruct’ を実行するように変えている。
env = SConscript('./godot-cpp-4.2.1-stable/SConstruct')
PKG_CONFIG_EXE_DIR はpkg-config の実行ファイルのフルパスを指定する。未設定であれば強制終了させる。
PKG_CONFIG_PATH は各 C++ ライブラリの pkg-config ファイル (*.pc) のパスを指定する。未設定であれば強制終了させる。
ターゲットとして有効なのは mingw、x86 64bit アーキテクチャのみ。
if env['platform'] == "windows" and env['use_mingw'] == True and env['arch'] == "x86_64":
godot-cpp のビルドで、CXXFLAGS に”-fno-exceptions” が付与されるので剥ぐ。
    # strip -fno-exceptions from $CXXFLAGS
    env['CXXFLAGS'] = SCons.Util.CLVar(str(env['CXXFLAGS']).replace("-fno-exceptions", ""))
使用する C++ ライブラリは ‘pcl_features’, ‘pcl_io’, ‘boost’, ‘eigen3’。
pkgs = ['pcl_features', 'pcl_io', 'boost', 'eigen3']
依存するシステムダイナミックリンクファイルを指定する。
libs_implicit = ['psapi', 'wsock32', 'comdlg32', 'oleAut32', 'uuid']
ソースコードファイルと SConstruct ファイルを以下のように設置する。
C:\dev\gdextension_test3
│  SConstruct
│
└─src
        gdexample.cpp
        gdexample.h
        register_types.cpp
        register_types.h
godot-cpp をプロジェクトのサブモジュールとすべく、取得する。
Microsoft Windows [Version 10.0.22631.2861]
(c) Microsoft Corporation. All rights reserved.

c:\Users\user>mingw64.bat
c:\dev>cd gdextension_test3
c:\dev\gdextension_test3>git clone --depth 1 https://github.com/godotengine/godot-cpp.git -b godot-4.2.1-stable godot-cpp-4.2.1-stable
この結果ディレクトリ構造は以下のようになる。
C:\dev\gdextension_test3
│
│  SConstruct
│
├─godot-cpp-4.2.1-stable
│  ※多数のファイル
│
└─src
        gdexample.cpp
        gdexample.h
        register_types.cpp
        register_types.h
scons でビルド実行。
c:\dev\gdextension_test3>scons platform=windows use_mingw=yes
ビルドが成功すると以下のようなディレクトリ構成になる。
C:\dev\gdextension_test3
│  .sconsign.dblite
│  SConstruct
│
├─godot-cpp-4.2.1-stable
│  ※多数のファイル
│
├─project
│  └─bin
│          libgdexample.windows.template_debug.x86_64.dll
│          liblibgdexample.windows.template_debug.x86_64.a
│
└─src
        gdexample.cpp
        gdexample.h
        gdexample.o
        register_types.cpp
        register_types.h
        register_types.o
“libgdexample.windows.template_debug.x86_64.dll” が目的の成果物。
使用しているダイナミックリンクライブラリを調べてみる。
c:\dev\gdextension_test3\project\bin>objdump -p libgdexample.windows.template_debug.x86_64.dll | findstr /i "\.dll"
libgdexample.windows.template_debug.x86_64.dll:     file format pei-x86-64
        DLL Name: ADVAPI32.dll
        DLL Name: KERNEL32.dll
        DLL Name: msvcrt.dll
Name                            00000000001f6032 libgdexample.windows.template_debug.x86_64.dll

c:\dev\gdextension_test3\project\bin>
余計なダイナミックリンクライブラリへの依存は無いことが確認できる。
設置
以下のような gdextension ファイルを作成する。
gdexample.gdextension
[configuration]

entry_symbol = "example_library_init"
compatibility_minimum = "4.1"

[libraries]

windows.debug.x86_64 = "res://bin/libgdexample.windows.template_debug.x86_64.dll"
そして Godot エディタプロジェクトを、例えば demo_03 という名前で作成し、demo_03の以下のプロジェクトディレクトリに設置する。
res://
└─bin/
        gdexample.gdextension
        libgdexample.windows.template_debug.x86_64.dll
参考例として “C:\dev\demos\” というディレクトリ配下に “C:\dev\demos\demo_03” という Godot エンジンプロジェクトを作成する。ここでは説明を簡単にするため、コマンドプロンプトを用いた方法を説明する。
先ずディレクトリの作成。
c:\dev>mkdir demos
c:\dev>cd demos
c:\dev\demos>mkdir demo_03
c:\dev\demos>cd demo_03
空の Godot エンジンプロジェクトを作成。
c:\dev\demos\demo_03>copy nul .\project.godot
bin ディレクトリを作成し、GDEXTENSION のダイナミックリンクライブラリを設置する。
c:\dev\demos\demo_03>mkdir bin
c:\dev\demos\demo_03>cd bin
c:\dev\demos\demo_03\bin>copy c:\dev\gdextension_test3\project\bin\*.dll .
C:\dev\dems\demo_03\bin ディレクトリに gdextension ファイルを設置する。
pcl のビルドディレクトリから点群ファイル car6.pcd をコピーする。
c:\dev\demos\demo_03\bin>copy C:\dev\pcl-1.13.1\test\car6.pcd .
設置後のディレクトリ構成は以下のようになる。
C:\dev\demos\demo_03
│  project.godot
│
└─bin
        car6.pcd
        gdexample.gdextension
        libgdexample.windows.template_debug.x86_64.dll
Godot エンジンプロジェクトを起動する。
c:\dev\demos\demo_03>godot.windows.editor.x86_64.exe -e .
名無しのプロジェクトが起動する。
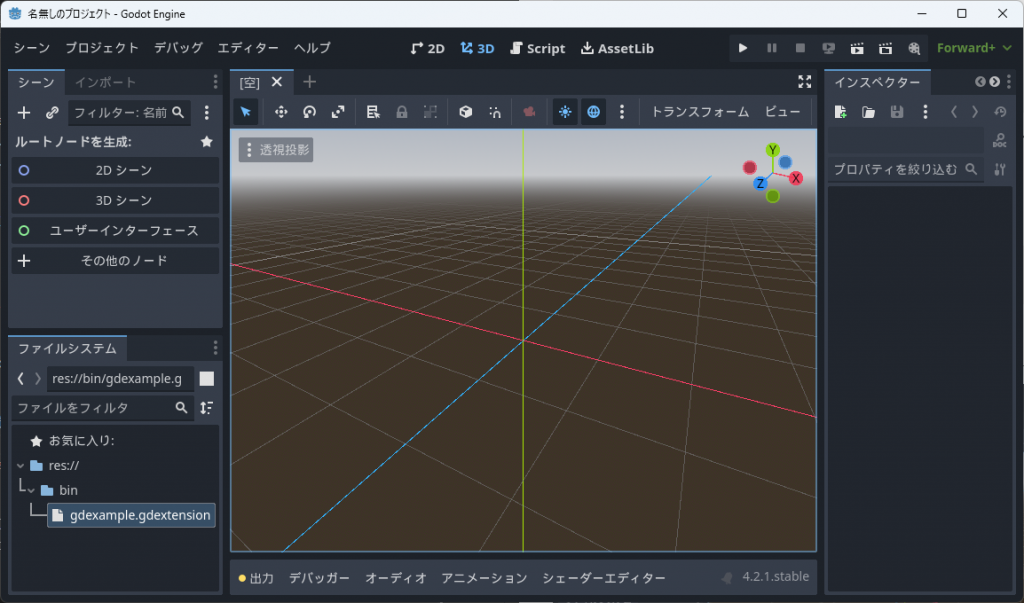
GDEXTENSION が読み込まれている場合は、左下のリソースツリーに gdexample.gdextension が存在する。
先ずシーンを設定する。メニューの「シーン」を選ぶとメニューが現れるので「新規シーン」を選択する。

左ペインの「シーン」のタブに「ルートノードを生成:」という欄が現れるので、「その他のノード」を選ぶ。
検索欄で “node3d” と入力し、Node3d を 選択し、「作成」を行う。
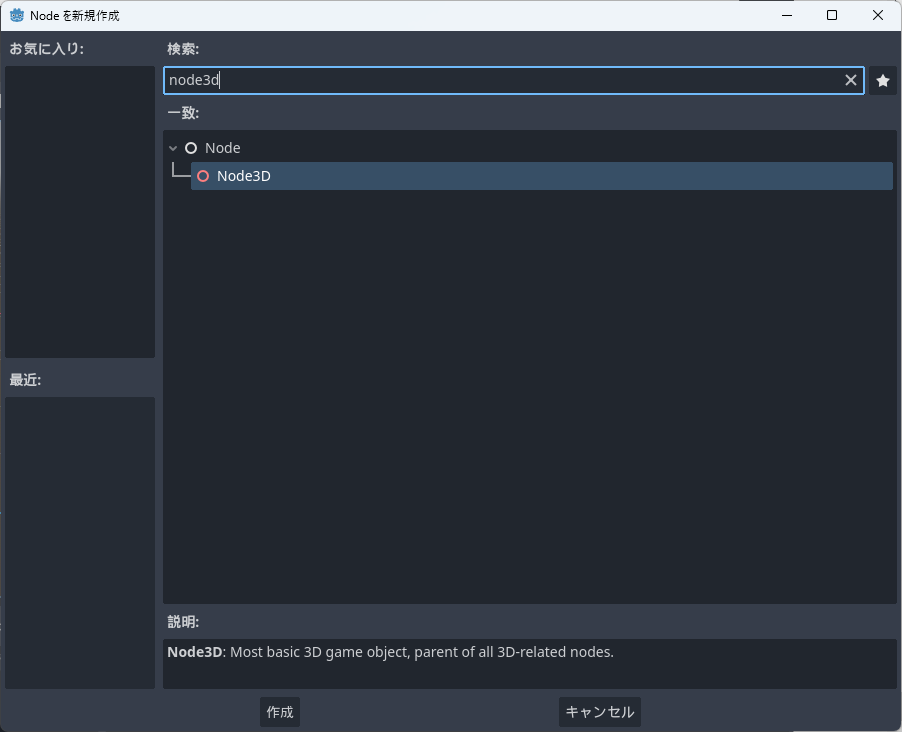
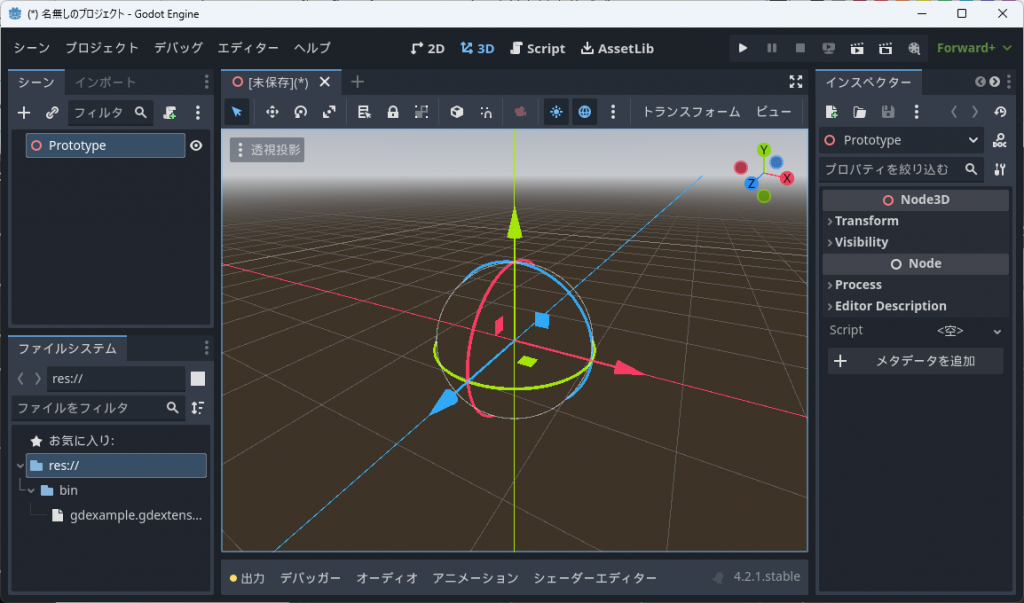
Node3D がシーンのルートとなる。

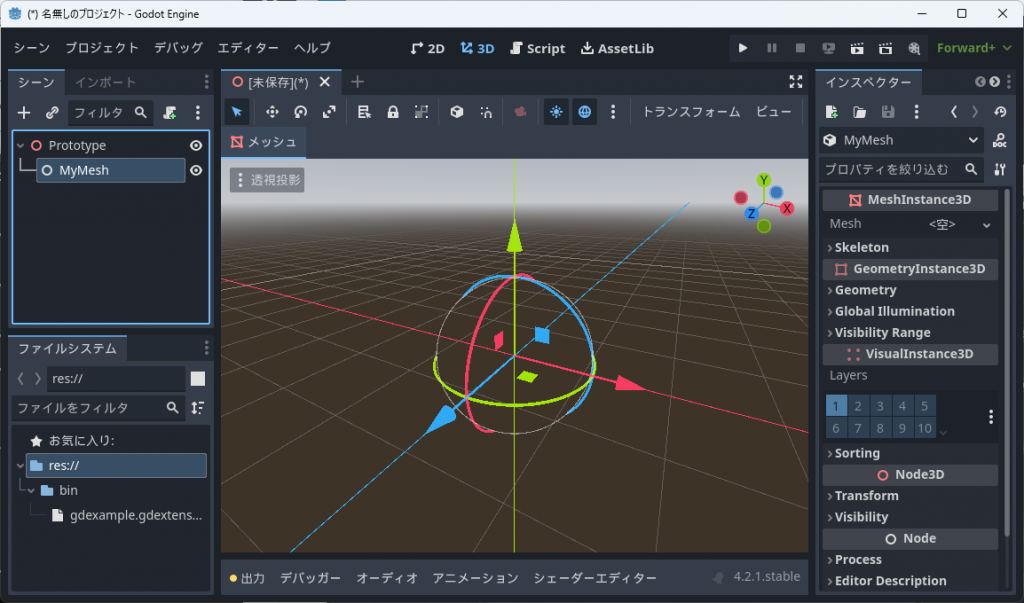
Nodo3D のノードの名前を Prototype に変更する。
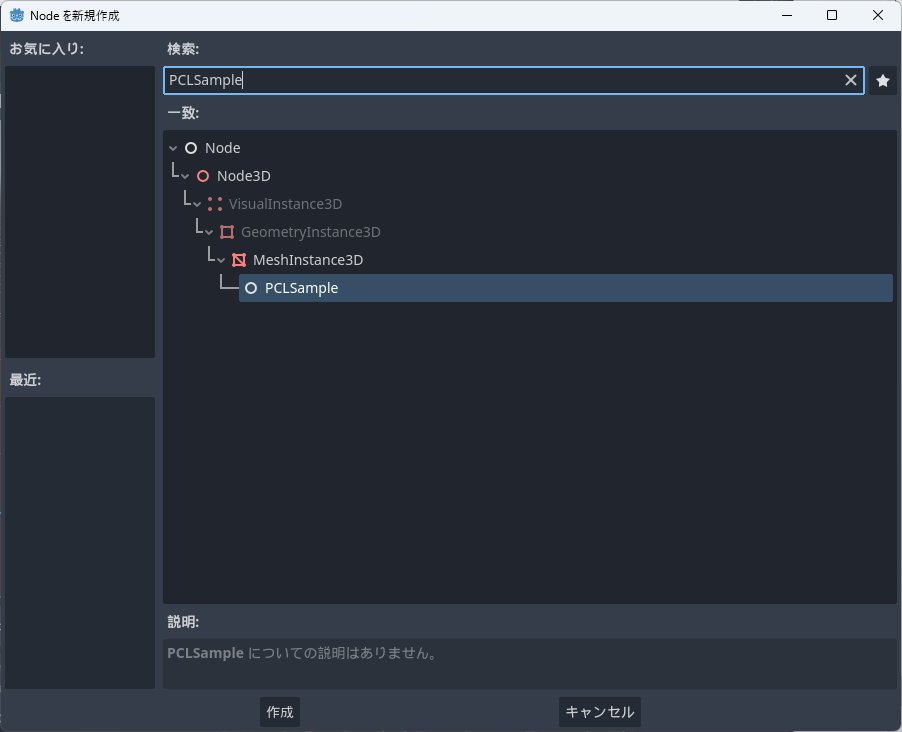
Prototype の下に 作成した GDEXTENSION を子ノードとして追加する。検索欄に “PCLSample” と入力すると現れるので選択し、「作成」する。
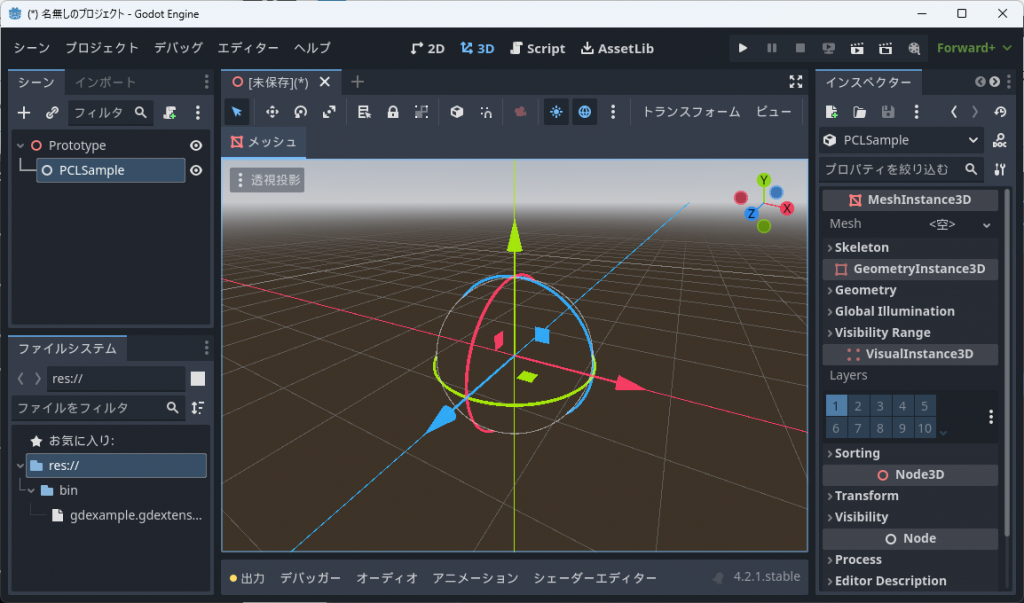
PCLSample のノードの名前を MyMesh に変更する。
MyMesh にスクリプトをアタッチする。
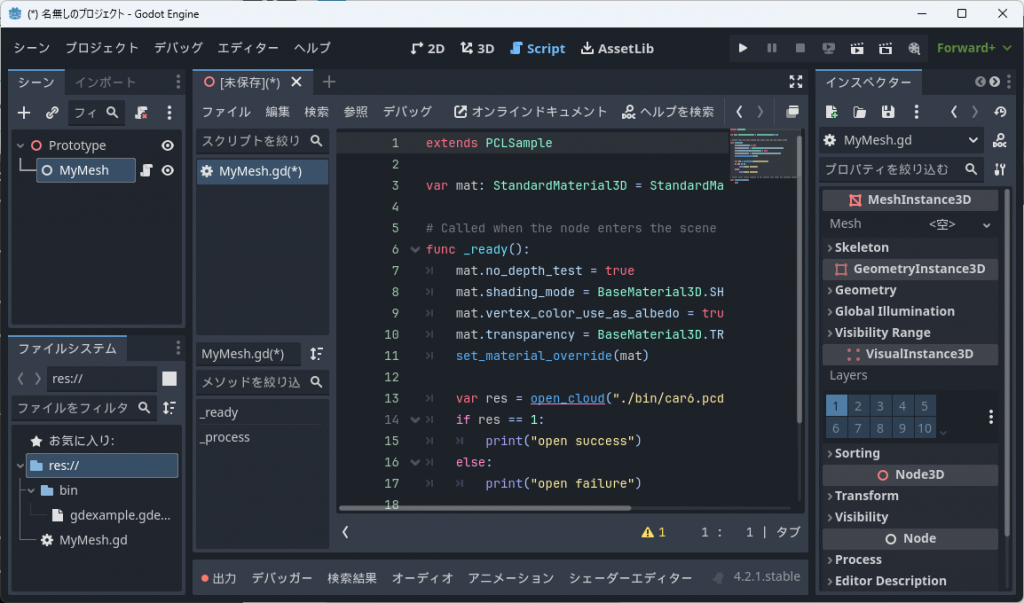
MyMesh.gd
extends PCLSample

var mat: StandardMaterial3D = StandardMaterial3D.new()

# Called when the node enters the scene tree for the first time.
func _ready():
	mat.no_depth_test = true
	mat.shading_mode = BaseMaterial3D.SHADING_MODE_UNSHADED
	mat.vertex_color_use_as_albedo = true
	mat.transparency = BaseMaterial3D.TRANSPARENCY_ALPHA
	set_material_override(mat)

	var res = open_cloud("./bin/car6.pcd")
	if res == 1:
		print("open success")
	else:
		print("open failure")

# Called every frame. 'delta' is the elapsed time since the previous frame.
func _process(delta):
	pass
ここで、func _ready() の最初でマテリアルのオーバーライド設定を行っている。本 GDEXTENSION では MeshInstance3D クラスを継承した PCLSample クラスの中で ImmediateMesh クラスを用いて mesh を動的生成している。この mesh のマテリアルが必要であるが、オーバーライド指定を行うことで、簡略化する。設定内容は光源なしで表示できるようにするとともに、遮蔽を無視して全てを表示するもの。
Prototype 配下に CharacterBody3D ノードを追加し、名前を CameraBase に変更する。

CameraBase にスクリプトをアタッチする。
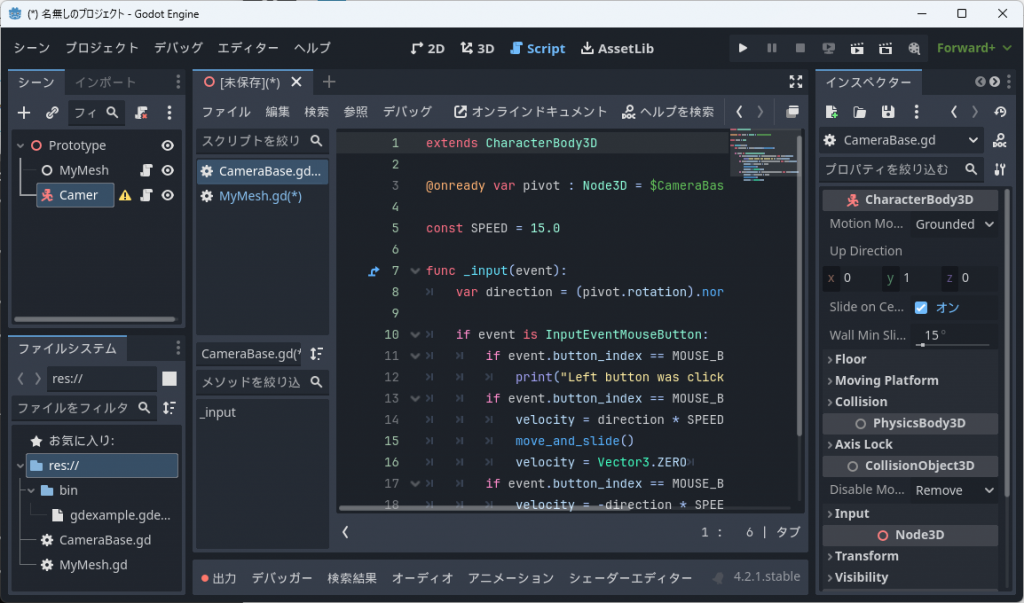
CameraBase.gd
extends CharacterBody3D

@onready var pivot : Node3D = $CameraBasePivot

const SPEED = 15.0

func _input(event):
	var direction = (pivot.rotation).normalized()

	if event is InputEventMouseButton:
		if event.button_index == MOUSE_BUTTON_LEFT and event.pressed:
			print("Left button was clicked at ", event.position)
		if event.button_index == MOUSE_BUTTON_WHEEL_UP and event.pressed:
			velocity = direction * SPEED
			move_and_slide()
			velocity = Vector3.ZERO
		if event.button_index == MOUSE_BUTTON_WHEEL_DOWN and event.pressed:
			velocity = -direction * SPEED
			move_and_slide()
			velocity = Vector3.ZERO
CameraBase 配下に Node3D ノードを追加し、名前を CameraBasePivot に変更する。
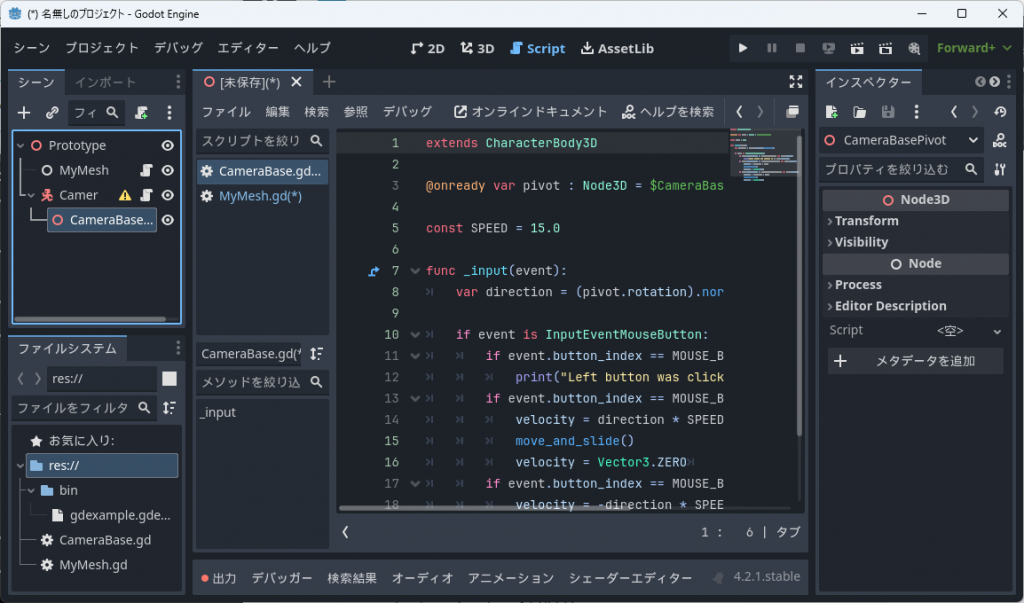
CameraBasePivot にスクリプトをアタッチする。

CameraBasePivot.gd
extends Node3D

func _ready():
	Input.set_mouse_mode(Input.MOUSE_MODE_CAPTURED)

func _process(_delta):
	if Input.is_action_just_pressed("ui_cancel"):
		get_tree().quit()

func _unhandled_input(event):
	if event is InputEventMouseMotion:
		rotate_x(-event.relative.y * 0.005)
		rotate_y(-event.relative.x * 0.005)
		transform = transform.orthonormalized()
CameraBasePivot 配下に Camera3D ノードを追加する。
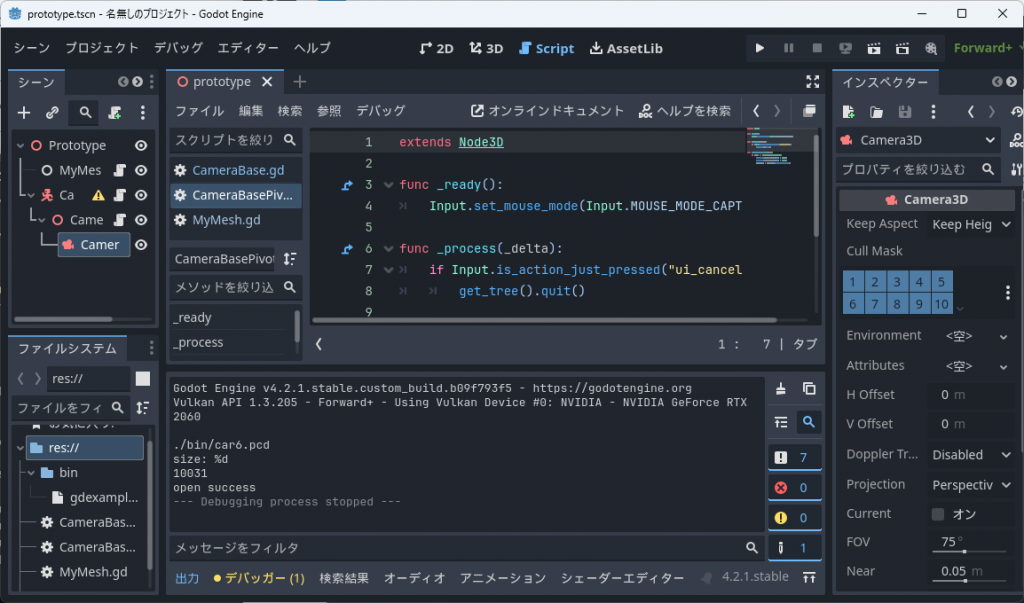
CameraBase のインスペクターで、Node3D->Transform->z を 0 から 3 に変更する。
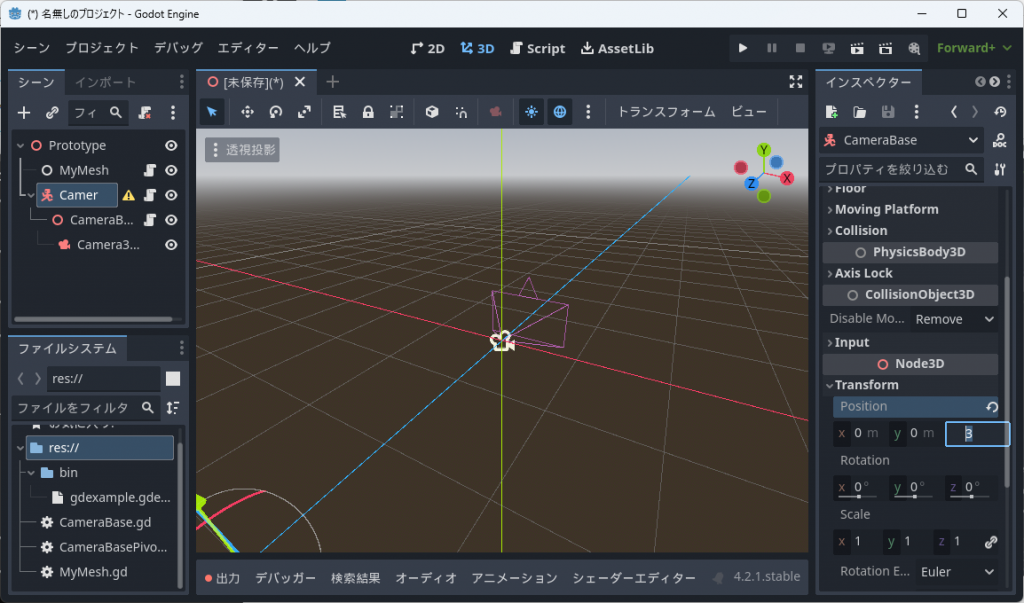
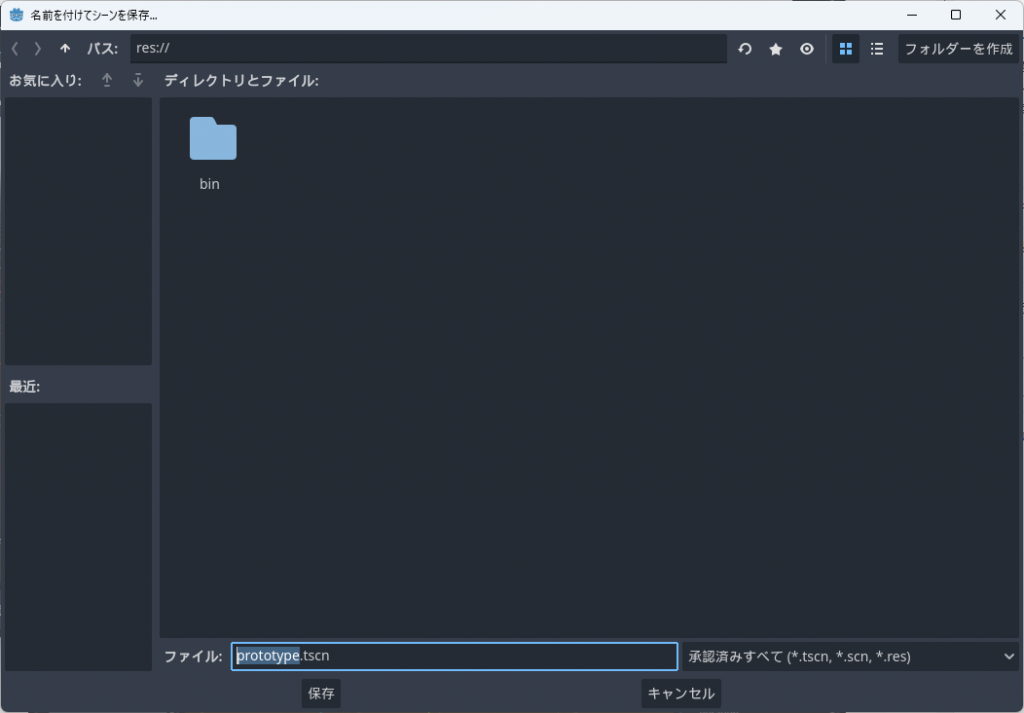
Ctrl-“S” でシーンを保存する。
“F6” を押下して実行すると赤い点群が表示される。
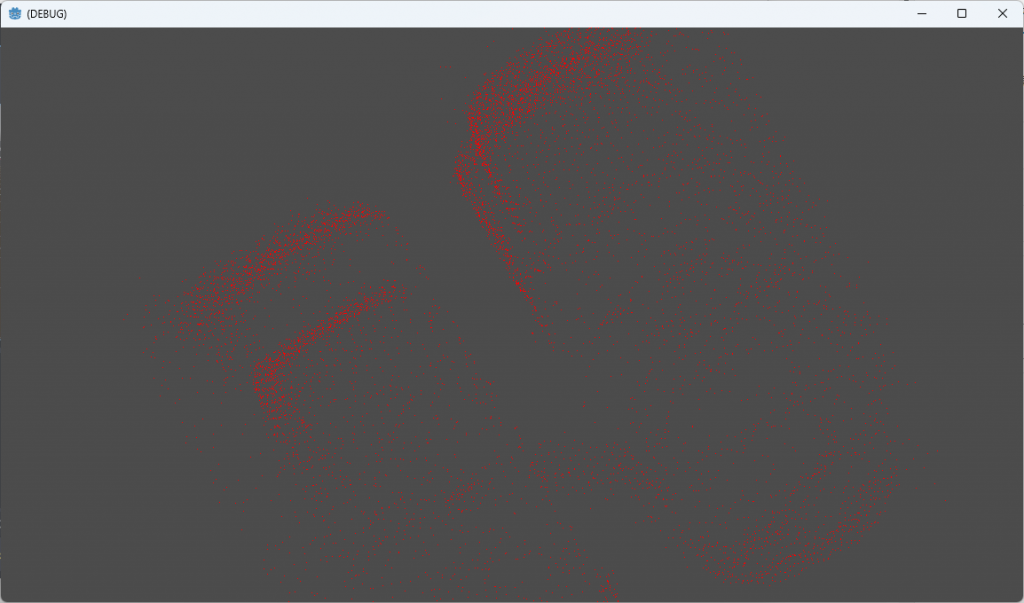
マウスホイールで前進/後退ができ、マウスを動かすとカメラが首を振る。マウスカーソルは無くなるが、”ESC” キーで終了することができる。
GUI 的には作りこんでいないのでいまいちではあるが、凄く簡単に点群ビューワーが Godot エンジンアプリケーションとして実装できた。
本稿の振り返り
(その4)では opencv の MAT 画像を表示することができ、今回のサンプルでは pcl の点群データーを表示できた。これに Godot エンジンの持つリッチな GUI を被せてゆけばよい。
pcl は他ライブラリの依存が多い、複雑な C++ ライブラリではあるが、丁寧に準備を行うと別段問題無く GDEXTENSION に組み込むことができることを実証できたと思う。
願わくば、この一連の記事が Godot GDEXTENSION の発展に役立つことを。

コメント
I am really inspired together with your writing skills as neatly as with the layout for your weblog. Is this a paid subject or did you customize it your self? Anyway keep up the excellent quality writing, it is uncommon to look a great weblog like this one today. !