
今まで「挿絵画家になろう」として、MB-Labを用いたアニメ調3D人体モデルに関して検討してきました。
簡単ではないですけれど、服も用意できるようになってきました。
服を作れるようになってくると今度は柄に拘りたくなってきますよね?
ネットには様々な画像素材があって、中には無料で提供頂けるものもあります。
ありがたいですね、便利な世の中になったものです。
ただ今回は二次元画像マテリアルを自分で生成しようという試みです。
お付き合いいただけると幸いです。
諸兄姉は「#つぶやきglsl」というtwitterのハッシュタグをご存じでしょうか?
https://twitter.com/hashtag/つぶやきglsl
画像や動画を表示するためのglslコードを280文字以下でtwitterに投稿するものです。
投稿されたglslコードはtwigl.appというサイトで実行・表示できます。
「#つぶやきglsl」の投稿には、投稿コードにより表示されるであろう動画や画像が添付されているのですが、それがまたとても美麗なものばかりです。
このような複雑で美しい表現がたった280文字で実現できるのです。
glslとはOpenGLのシェーダー言語なのですが、その表現力の豊かさに驚かされます。
とはいえ、いきなりこのような匠の技が使えるものではありません。
技術は一つ一つ、目的意識をもって習得していかなければならないでしょう。
そして習得するべき技術は、簡単で役に立つものを選ぶべきです。
本投稿の目的はglslのフラグメントシェーダーを用いて伝統的紋様を表現することです。
glslに限らず、フラグメントシェーダープログラムは難解で複雑な言語です。
世の中にプログラム言語は数多あれど、これほど初心者キラーな言語も珍しいと思います。
しかし求めるならば道は開かれます。
非常に良い入門サイトがあるのです。
The Book of Shaders
全ての入門者はこのサイトで学ぶことができます。
このサイトの良いところは、実際のglslのコードをWEBブラウザ上で確認できるサイトを用意してくれているところです。
以下のWEBページを開いてください。
http://editor.thebookofshaders.com/
このWEBページの左側のコードを書き換えると、変更が右側の画像に反映されます。
生成された画像は右クリックでダウンロードすることができます。
まさに至れり尽くせり。
以下、伝統紋様のglslコードを晒しますので、コピペして画像を確認してください。
そしてパラメータを変えてみて、お好みの画像に変更してください。
では一番簡単な模様「市松」から。
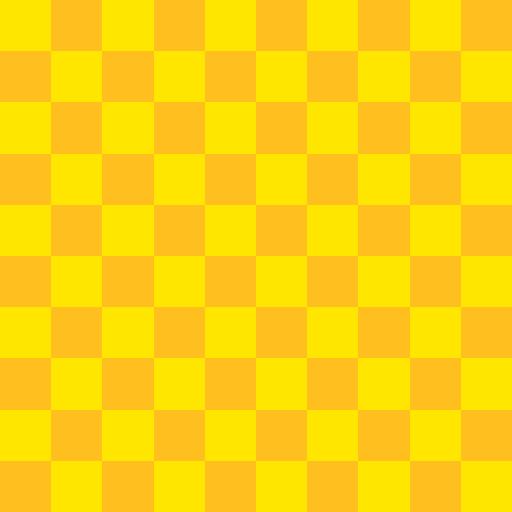
色違いの正方形を交互に並べてゆく紋様です。
洋の東西を問わず古くから人気のある模様です。
glslコードによる実装例は以下。
#ifdef GL_ES
precision mediump float;
#endif

uniform vec2 u_resolution;
uniform float u_time;

void main (void) {
    vec2 st = gl_FragCoord.xy/u_resolution.xy;

    st *= 5.;
    st = fract(st);
    st *= 2.;
    float index = 0.;
    index += step(1., mod(st.x,2.));
    index += step(1., mod(st.y,2.))*2.;
    st = fract(st);

    // c is color vector (r, g, b)
    // white is (1., 1., 1.) and black is (0., 0., 0.)
    vec3 c = vec3(1., .75, .12); // r, g, b

    // index
    // 0.:BL 1.:BR 2.:TL 3.:TR
    if(index == 1. || index == 2.){
       c = vec3(1., .9, 0.);
    }

    gl_FragColor = vec4(c ,1.);
}
市松模様を斜めにしたものもあります。
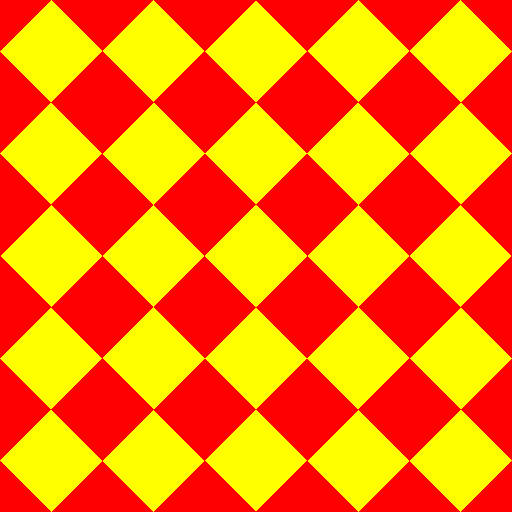
glslコードによる実装例は以下。
#ifdef GL_ES
precision mediump float;
#endif

uniform vec2 u_resolution;
uniform float u_time;

float lengthN(vec2 v, float n){
  vec2 tmp = pow(abs(v), vec2(n));
  return pow(tmp.x+tmp.y, 1.0/n);
}

void main (void) {
    vec2 st = gl_FragCoord.xy/u_resolution.xy;

    st *= 5.;
    st = fract(st);
    st *= 2.;
    float index = 0.;
    index += step(1., mod(st.x,2.));
    index += step(1., mod(st.y,2.))*2.;
    st = fract(st);

    // index
    // 0.:BL 1.:BR 2.:TL 3.:TR
    if(index == 1.){
        st.x = 1.-st.x;
    }
    if(index == 2.){
        st.y = 1.-st.y;
    }
    if(index == 3.){
        st.x = 1.-st.x;
        st.y = 1.-st.y;
    }
    st *= 0.5;

    // c is color vector (r, g, b)
    // white is (1., 1., 1.) and black is (0., 0., 0.)
    vec3 c = vec3(1., 0., 0.);
    float l=lengthN(st,1.);
    if (lengthN(st,1.) > 0.5){
       c = vec3(1., 1., 0.);
    }
    gl_FragColor = vec4(c ,1.);
}
次は「七宝」。
円を斜めにずらしながら重ねていく紋様です。
円と円の重複部分で色を変えることにより星が現れます。
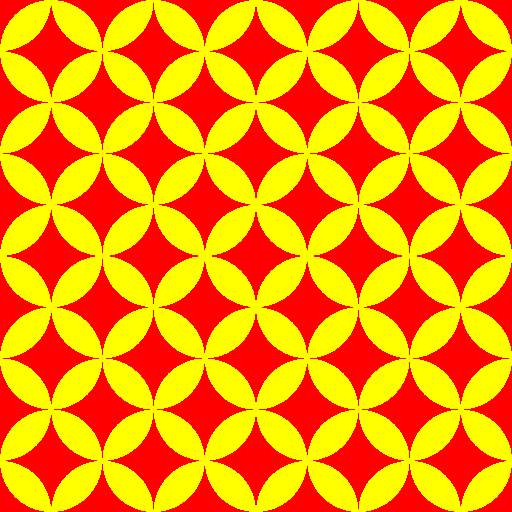
glslコードによる実装例は以下。
#ifdef GL_ES
precision mediump float;
#endif

#define PI 3.14159265358979323846

uniform vec2 u_resolution;
uniform float u_time;

void main (void) {
    vec2 st = gl_FragCoord.xy/u_resolution.xy;

    st *= 5.;
    st = fract(st);
    st *= 2.;
    float index = 0.;
    index += step(1., mod(st.x,2.));
    index += step(1., mod(st.y,2.))*2.;
    st = fract(st);

    // index
    // 0.:BL 1.:BR 2.:TL 3.:TR
    if(index == 1. || index == 2.){
        st.x = 1.-st.x;
    }

    // c is color vector (r, g, b)
    // white is (1., 1., 1.) and black is (0., 0., 0.)
    vec3 c = vec3(1., 0., 0.);
    float d;
    if ((distance(vec2(0., 0.), st)) < 1. && (distance(vec2(1., 1.), st)) < 1.){
       c = vec3(1., 1., 0.);
    }
    gl_FragColor = vec4(c ,1.);
}
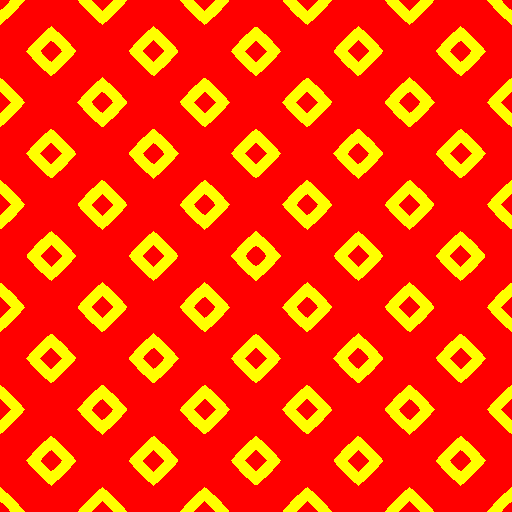
次は「鹿子」です。
鹿の背中の模様の意匠です。
絞り染めの代表的な紋様ですね。
glslコードによる実装例は以下。
#ifdef GL_ES
precision mediump float;
#endif

uniform vec2 u_resolution;
uniform float u_time;

float lengthN(vec2 v, float n){
  vec2 tmp = pow(abs(v), vec2(n));
  return pow(tmp.x+tmp.y, 1.0/n);
}

void main (void) {
    vec2 st = gl_FragCoord.xy/u_resolution.xy;

    st *= 5.;
    st = fract(st);
    st *= 2.;
    float index = 0.;
    index += step(1., mod(st.x,2.));
    index += step(1., mod(st.y,2.))*2.;
    st = fract(st);

    // index
    // 0.:BL 1.:BR 2.:TL 3.:TR
    if(index == 1.){
        st.x = 1.-st.x;
    }
    if(index == 2.){
        st.y = 1.-st.y;
    }
    if(index == 3.){
        st.x = 1.-st.x;
        st.y = 1.-st.y;
    }
    st *= 0.5;

    // c is color vector (r, g, b)
    // white is (1., 1., 1.) and black is (0., 0., 0.)
    vec3 c = vec3(1., 0., 0.);
    if (   (lengthN(st, .7) > 1.0 && lengthN(st, .7) < 1.2)
        || (lengthN(st-.5, .7) > 1.0 && lengthN(st-.5, .7) < 1.2)){
       c = vec3(1., 1., 0.);
    }
    gl_FragColor = vec4(c ,1.);
}
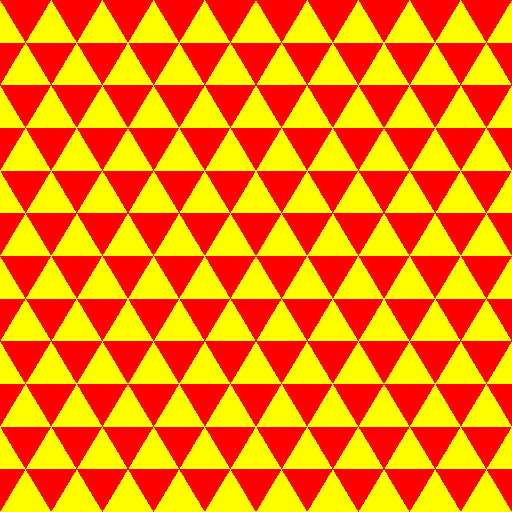
次は「鱗」。
鱗紋様には様々なパターンがあるのですけれど、代表的なのは色違いの二等辺三角形を並べてゆくものです。
glslコードによる実装例は以下。
#ifdef GL_ES
precision mediump float;
#endif

uniform vec2 u_resolution;
uniform float u_time;

float cross(vec2 v1, vec2 v2) {
    return v1.x*v2.y - v1.y*v2.x;
}

void main (void) {
    vec2 st = gl_FragCoord.xy/u_resolution.xy;

    st.x *= 10.;
    st.y *= 6.;
    st = fract(st);
    st *= 2.;
    float index = 0.;
    index += step(1., mod(st.x,2.));
    index += step(1., mod(st.y,2.))*2.;
    st = fract(st);

    // index
    // 0.:BL 1.:BR 2.:TL 3.:TR
    if(index == 1. || index == 2.){
        st.x = 1.-st.x;
    }

    // c is color vector (r, g, b)
    // white is (1., 1., 1.) and black is (0., 0., 0.)
    vec3 c = vec3(1., 0., 0.);
    if (cross(st,normalize(vec2(1.,1.))) > 0.0){
       c = vec3(1., 1., 0.);
    }
    gl_FragColor = vec4(c ,1.);
}
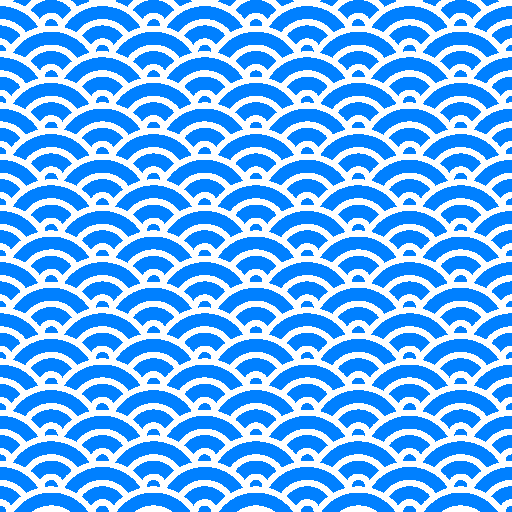
次は「青海波」です。
鱗紋様の特殊なパターンで重なり合う扇が波のように見えます。
glslコードによる実装例は以下。
#ifdef GL_ES
precision mediump float;
#endif

#define PI 3.14159265358979323846

uniform vec2 u_resolution;
uniform float u_time;

void main (void) {
    vec2 st = gl_FragCoord.xy/u_resolution.xy;

    st *= 5.;
    st = fract(st);
    st *= 2.;
    float index = 0.;
    index += step(1., mod(st.x,2.));
    index += step(1., mod(st.y,2.))*2.;
    st = fract(st);

    // index
    // 0.:BL 1.:BR 2.:TL 3.:TR
    if(index == 1. || index == 3.){
        st.x = 1.-st.x;
    }

    float t;
    float d;
    if((d = distance( vec2(1., -.5), st)) < 1.) {
        t = abs(cos(d*2.65*PI));
    }
    else if ((d = distance( vec2(0., 0.), st)) < 1.){
        t = abs(cos(d*2.65*PI));
    }
    else{
        t = abs(cos(distance(vec2(1., .5), st)*2.65*PI));
    }

    // c is color vector (r, g, b)
    // white is (1., 1., 1.) and black is (0., 0., 0.)
    vec3 c = vec3(1., 1., 1.);
    if (t > 0.5){
        c = vec3(0., .5, 1.);
    }
    gl_FragColor = vec4(c ,1.);
}
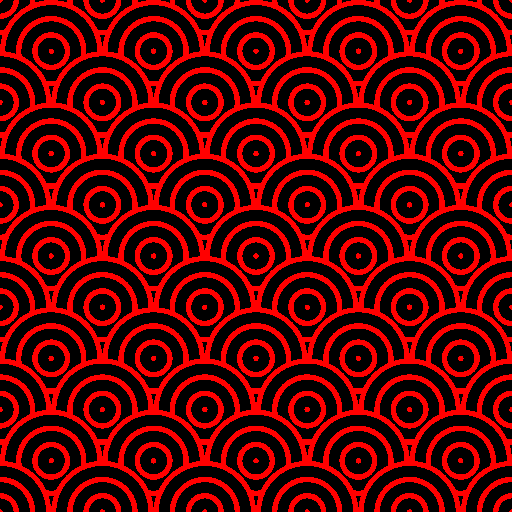
もう一つ「鱗」紋様の変種。
竜の鱗をイメージしたものです。
glslコードによる実装例は以下。
#ifdef GL_ES
precision mediump float;
#endif

#define PI 3.14159265358979323846

uniform vec2 u_resolution;
uniform float u_time;

void main (void) {
    vec2 st = gl_FragCoord.xy/u_resolution.xy;

    st *= 5.;
    st = fract(st);
    st *= 2.;
    float index = 0.;
    index += step(1., mod(st.x,2.));
    index += step(1., mod(st.y,2.))*2.;
    st = fract(st);

    // index
    // 0.:BL 1.:BR 2.:TL 3.:TR
    if(index == 1. || index == 2.){
        st.x = 1.-st.x;
    }

    float t;
    float d;
    if ((d = distance(vec2(0., 0.), st)) < 1.){
        t = abs(sin(d*3.15*PI));
   }
    else{
        t = abs(sin(distance(vec2(1., st.y), vec2(st.x, 1.))*3.15*PI));
    }

    // c is color vector (r, g, b)
    // white is (1., 1., 1.) and black is (0., 0., 0.)
    vec3 c = vec3(1., 0., 0.);
    if (t > 0.5){
        c = vec3(0., 0., 0.);
    }
    gl_FragColor = vec4(c ,1.);
}
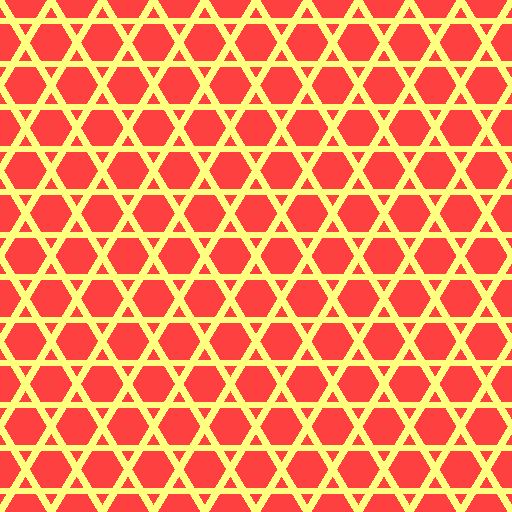
最後は「籠目」紋様。
編んだ籠の目の意匠です。
六芒星(ダビデの星)が無限に続くので魔除けとしての側面もあります。
glslコードによる実装例は以下。
#ifdef GL_ES
precision mediump float;
#endif

uniform vec2 u_resolution;
uniform float u_time;

float cross(vec2 v1, vec2 v2) {
    return v1.x*v2.y - v1.y*v2.x;
}

void main (void) {
    vec2 st = gl_FragCoord.xy/u_resolution.xy;

    st.x *= 10.;
    st.y *= 6.;
    st = fract(st);
    st *= 2.;
    float index = 0.;
    index += step(1., mod(st.x,2.));
    index += step(1., mod(st.y,2.))*2.;
    st = fract(st);
    st -= 0.5;

    // index
    // 0.:BL 1.:BR 2.:TL 3.:TR
    if(index == 1. || index == 2.){
        st.x = -st.x;
    }

    float l1=abs(cross(st,normalize(vec2(1.,1.))));
    float l2=length(vec2(0., st.y));

    // c is color vector (r, g, b)
    // white is (1., 1., 1.) and black is (0., 0., 0.)
    vec3 c = vec3(1., .25, .25);
    if (l1 < .12 || l2 < .07){
       c = vec3(1., 1., .5);
    }
    gl_FragColor = vec4(c ,1.);
}
いかがでしょうか。
伝統的な紋様が比較的簡単なglslコードで作成できました。
最近、鬼滅の刃の影響で日本伝統の柄も良いなあと思っています。
同士たる諸兄姉も登場人物のイラストに和テイストの服を着せてみてはいかがでしょうか?
晒したglslコードでは変数 vec3 c がカラーコードです。
お好みの色に変更すると良いかと。